The previous Exposure Tactics post, explored understanding the difference between how Lightroom, Photoshop, and light meters measure exposure. Now we continue to look at working with the files in postproduction.
Exposure Tweaks in Lightroom & Camera Raw
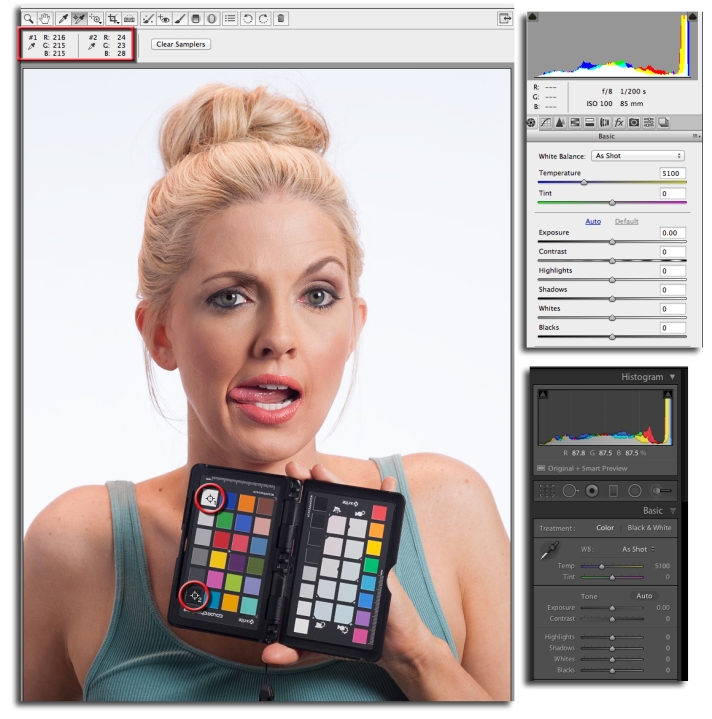
Calibrated computer monitors are great for displaying color and brightness. Unfortunately, the human visual system just can’t tell if a photograph is properly exposed by looking at it. The screen capture below looks great. The histogram shows detail in both highlights and shadows with zero clipping. A check of the numbers tells a different story.
 This photograph looks like a good exposure. The numbers reveal it is actually underexposed.
- The screenshot above is from Camera Raw 8.4.
- The exposure controls and histogram for Camera Raw and Lightroom are shown on the right side of the graphic.
- Color Sampler #1 is on the white patch of an X-Rite ColorChecker Passport that has the…
View original post 653 more words